
★V1 ( pencil, paper, eraser )
★★★
To start out you will begin with a very rough line drawing, working out anatomy, composition, expression, and pose. During this stage your initial idea can change drastically depending on how the sketch turns out. Once you have a feel for how the design will look you should begin drawing over the sketch with slightly darker lines, you should also be adding vague shadows to help define your image. These lines will inevitably be erased, so don't worry too much about erratic or stray lines just focus on the main image. At this point you should have a semi final image.

★V2 ( brush pen, micron, eraser)
★★★
Before you start inking you should know how I get the soft brush effect on my illustrations. You must dry out the brush pen by using it until it just barely has enough ink to create a line (DO NOT SQUEEZE THE BRUSH PEN). This will keep the brush pen in a constant dry state and all line work will remain consistent. This will slow down the inking process significantly. Line work and contrast are very important for this stage. Begin inking all of your sketched line work until completion with the exception of hair, shadows, and sold blacks. After the line work is completed now you will begin adding your inked shadows. To accomplish this texture with the brush pen you will make quick strokes with your pen, This will give the line a unique light texture. Next is your blacks which is simply filling in the predetermined areas. To ink the hair you will use your brush pen or micron and make quick strokes following the head shape. Allow small areas on the head for highlights and hair strands to be visible. Next you should wait while the solid blacks dry for a moment. Begin erasing the sketchy line work from underneath the inked image.
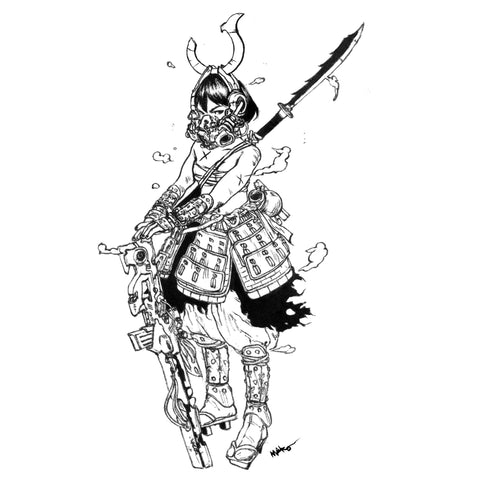
★V3 ( scanner, Photoshop )
★★★
place your image on the scanner and scan your image at 500-600dpi 16-bit Grey scale. The B&W setting will help get rid of any paper color if you have a hue on your paper. Once that is completed open your image in Photoshop. Create a new layer and make it a solid white. Use the magic wand tool and select the white of the paper. You will then click (select-similar) then click (select-modify-contract and set the contract amount to 2 and press OK) What this will do is create a solid and clean white background and leave your line work intact.
★★★
0 comments